Completing a Consultation from a Survey
This topic is intended for Independent pharmacies only and is not applicable to Rexall pharmacies.
After a patient answers a consultation survey sent from Propel Rx, the pharmacist can start analyzing the responses. Items that require review or signify possible issues display as red flags on the survey for easy detection. Once the consultation is complete, the patient's responses and any details of the consultation are recorded in the Patient Folder Clinical tab as a clinical note.
Patients that initiated a survey using an external link (i.e., Method = External Link) will not have their surveys automatically saved to the Patient Folder. In these situations, create the Patient Folder if it does not exist, copy the survey responses, and paste them manually as a clinical note.
A consultation survey can be completed from any one of the following locations. Select the dropdowns to learn more.
-
Navigate to the Surveys tile on the Workbench.
-
Ensure the Consultations tab is selected.
-
Select the survey link to open it in a separate window.
-
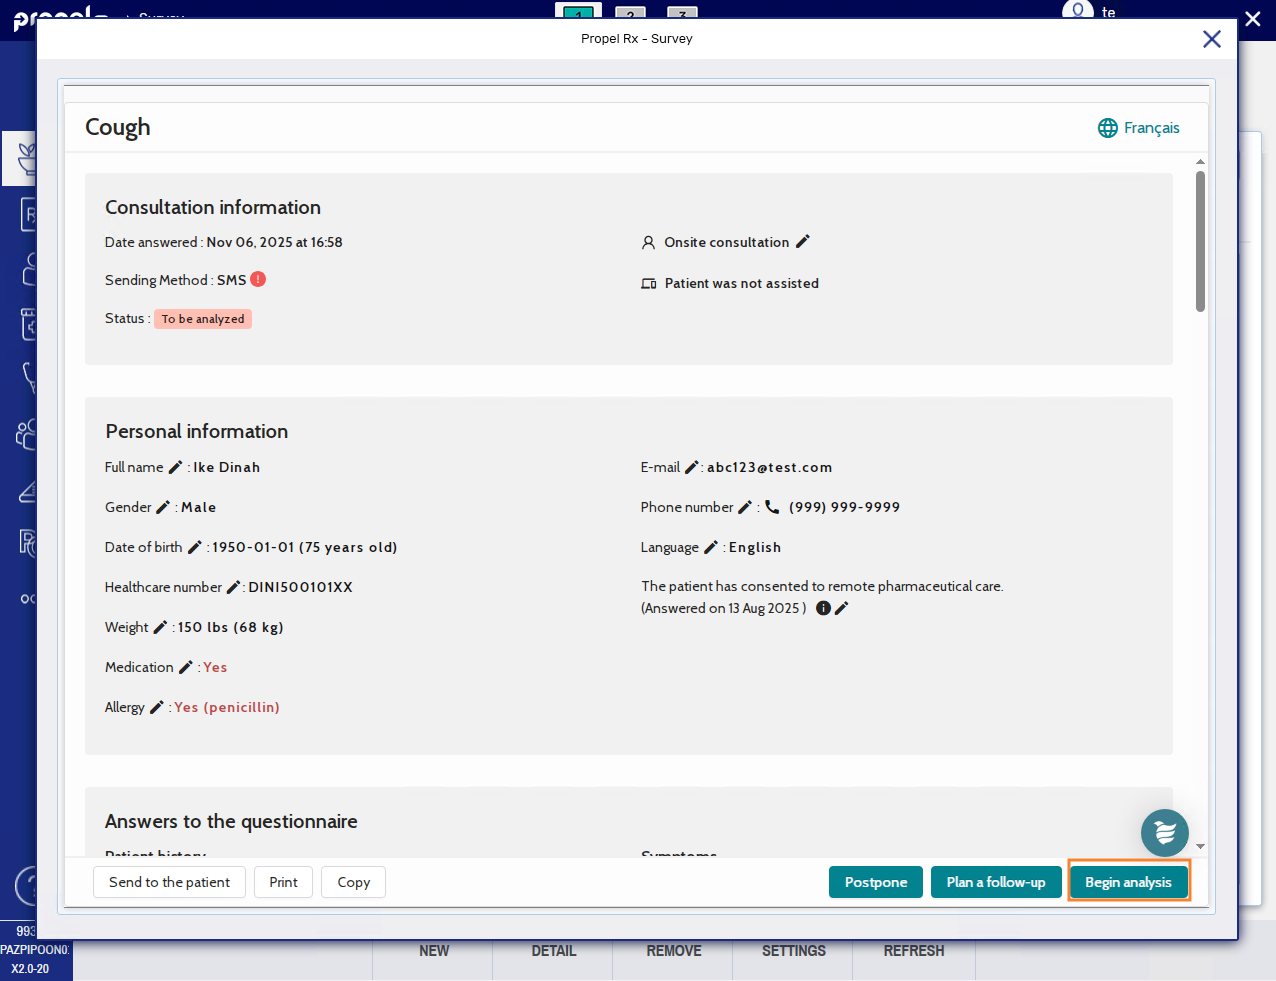
Select Begin analysis. The status of the survey changes from "To be analyzed" to "In progress".
-
Review the patient's personal information.
-
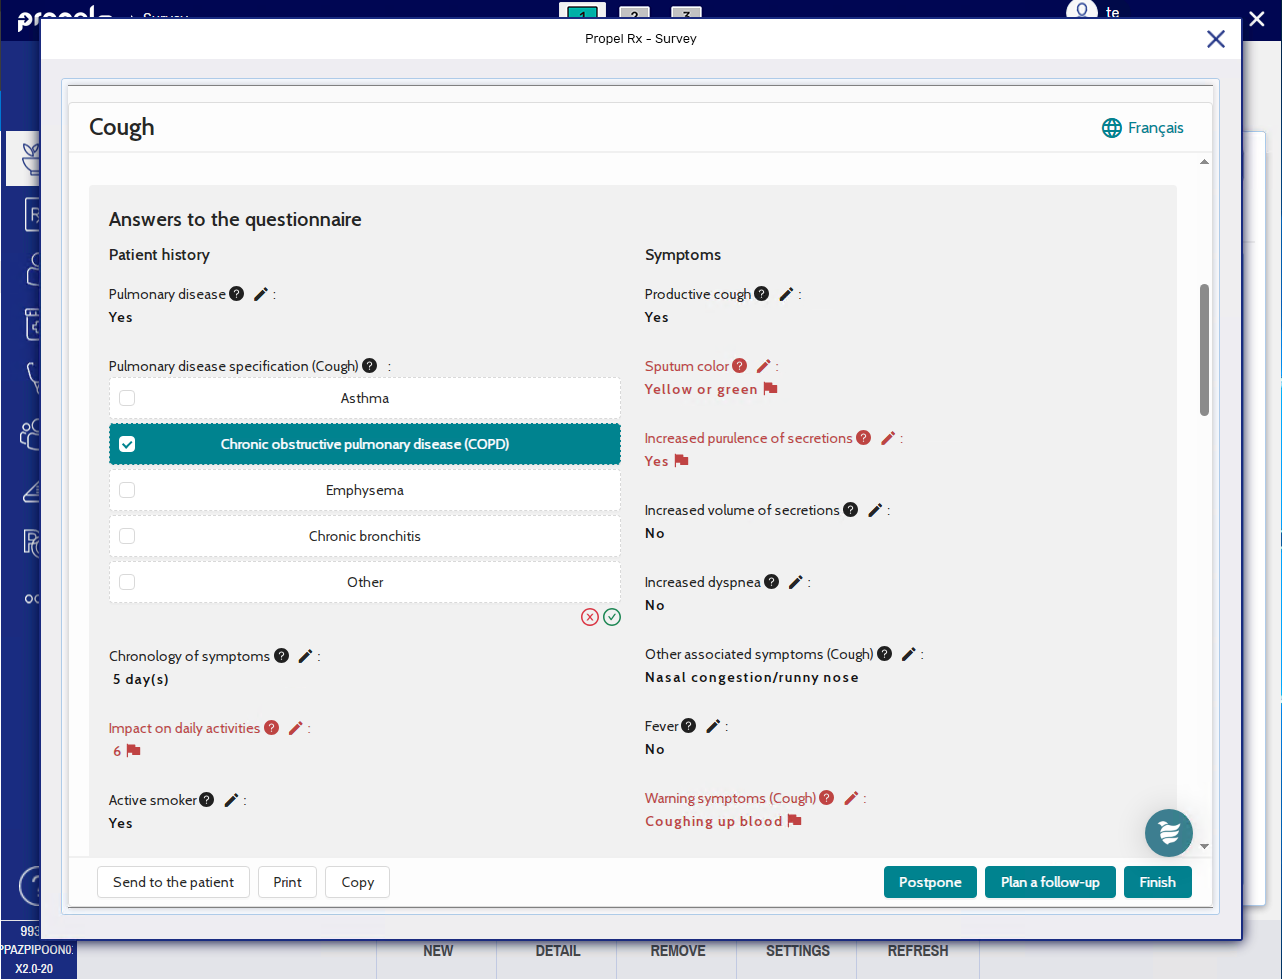
Review the patient's answers to the survey. Take note of any red flags
 .
. -
If after consulting with the patient, you need to modify their responses, select the edit button
 to make those corrections.
-
-
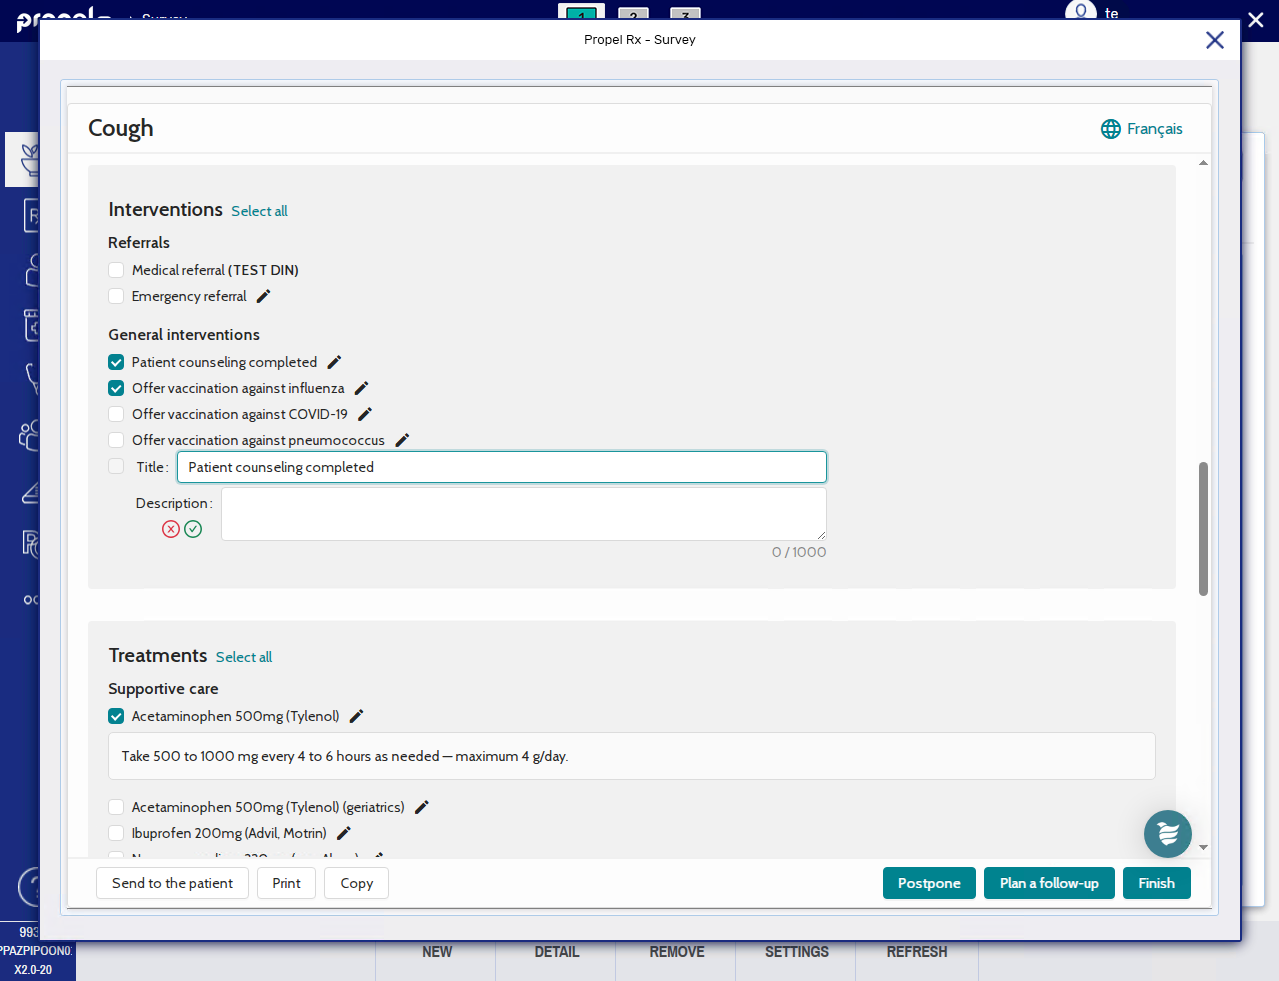
Select the checkboxes for the interventions, treatments, and/or tips provided to the patient.
-
Use the Select all link to select all checkboxes in the applicable section.
-
Additional information may auto-populate when a treatment or tip is selected. Select the edit button
to modify the text if needed. You can also use the edit button to add a description for an intervention. -
Select the + button to enter a free-form item.
-
-
In the Consultation notes section, enter any free-form notes for the consultation.

-
Optional: If you want to send the patient a copy of the consultation:
-
Select Send to the patient.
-
Select the survey sections you want to include.
-
Select the preferred language.
-
Select Confirm.

-
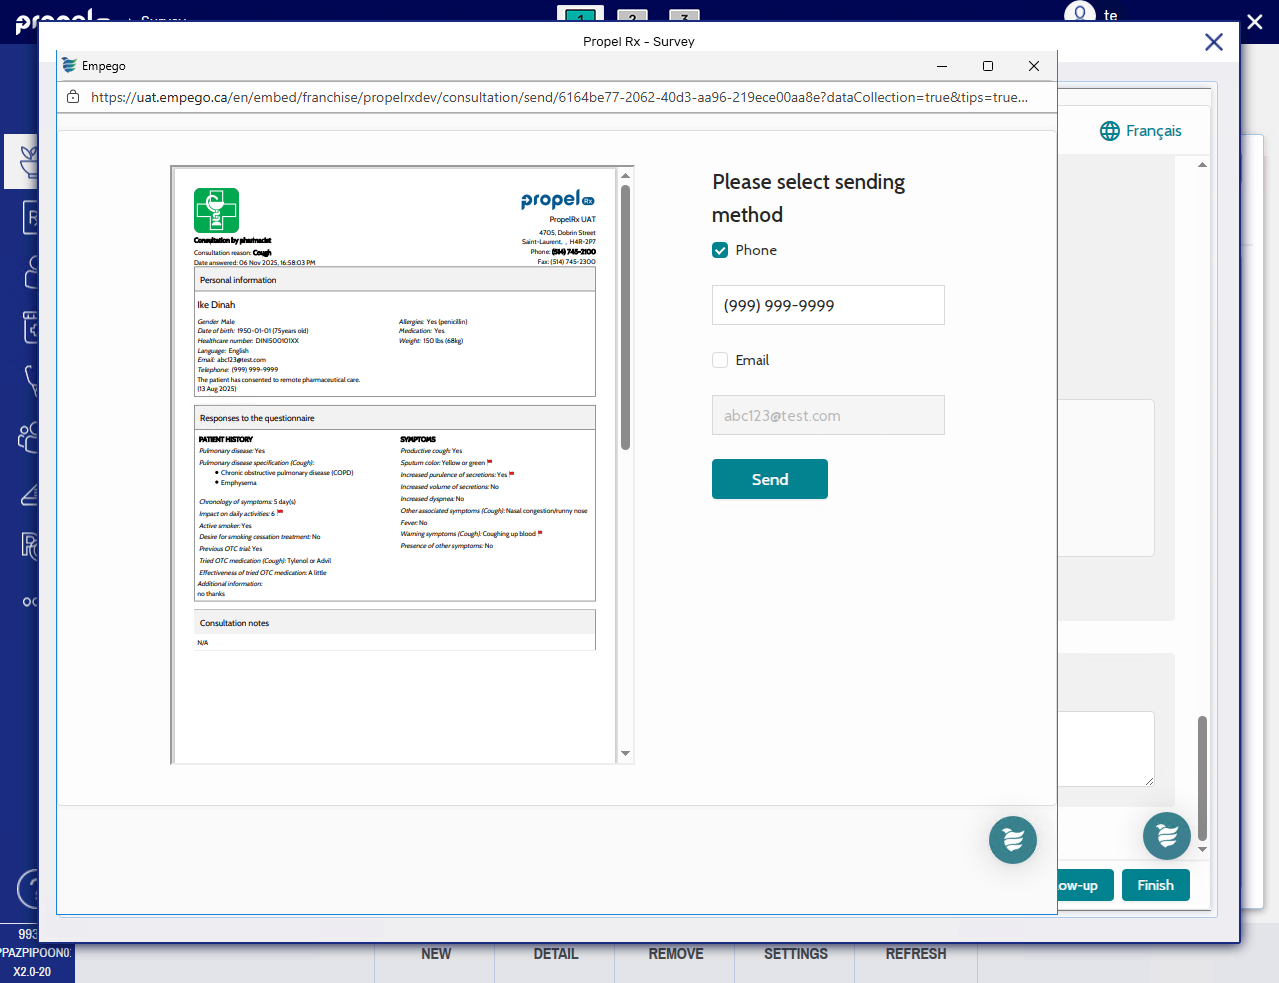
Select the preferred method for sending the copy to the patient. The patient's phone number and email address auto-populate based on the patient's profile on the survey site. If needed, you can modify the patient's contact information for the send. Changes are saved on the survey site but do not write back to Propel Rx.
-
Select Send. A confirmation page displays.

-
Select Close tab to return to the survey.
Your pharmacy's logo can be configured to print on this document. This can be set up in Franchise Settings on the survey site.
-
-
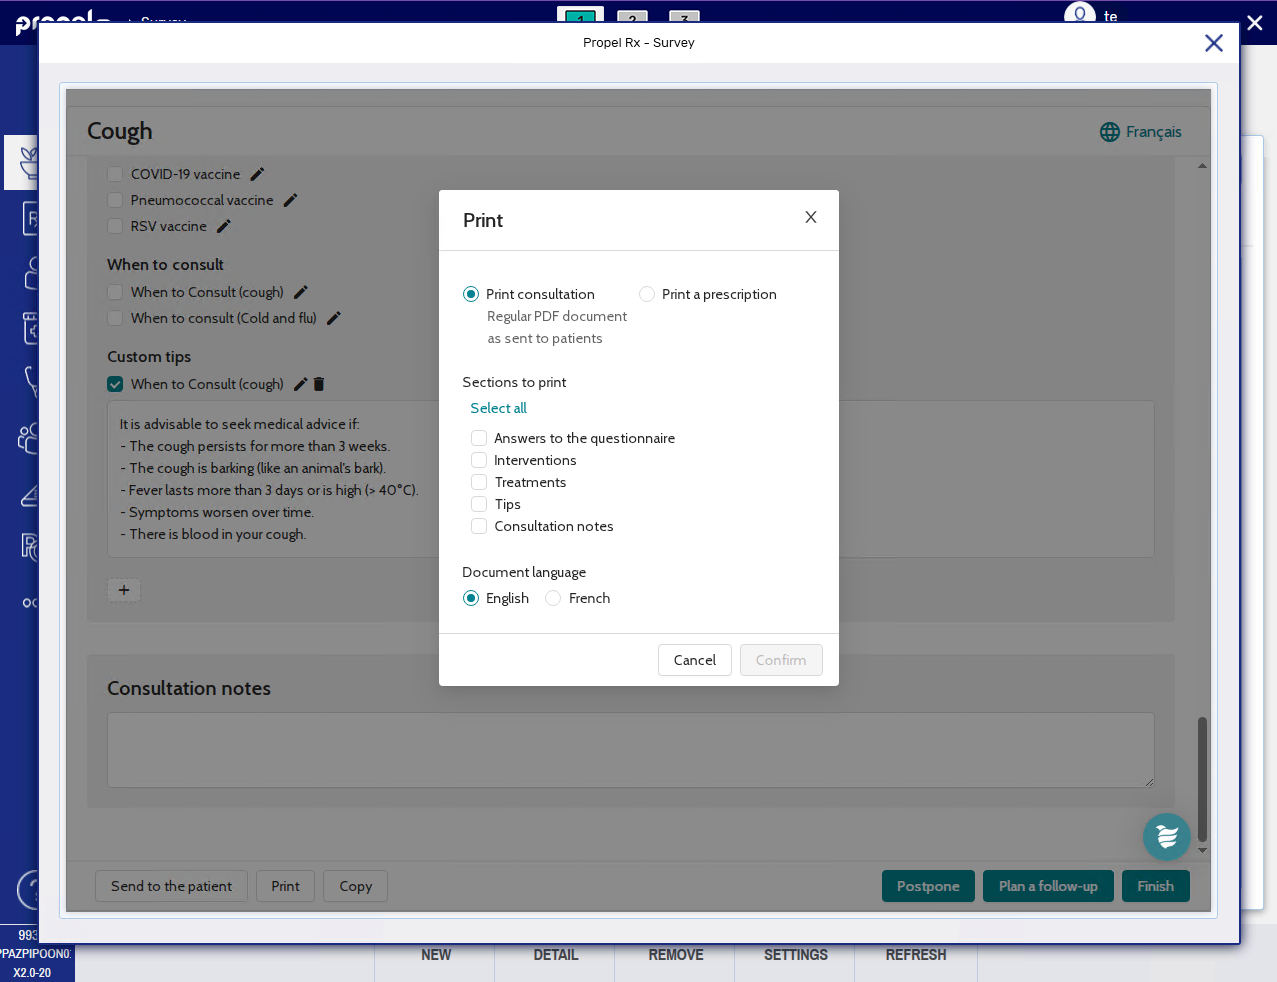
Optional: If you want to print the consultation:
-
Select Print.
-
Select whether to print the consultation or prescription.
-
The consultation document is the same as the patient copy described in step 9.
-
The prescription document lists the selected treatments from the consultation.
-
-
Select the survey sections you want to include.
-
Select the preferred language.
-
Select Confirm. The survey will print from your computer's default printer.
-
-
If the patient completed the survey using an external link (e.g., Method = External Link), select Copy. Open the Patient Folder in Propel Rx (or create one if it does not exist) and paste the contents into a clinical note.
-
Select Finish.
-
The survey vacates the Surveys tile.
-
A clinical note is added to the Clinical History section of the Patient Folder Clinical tab with a Type of Consultation, Description of the survey type, and User who sent the survey.
-
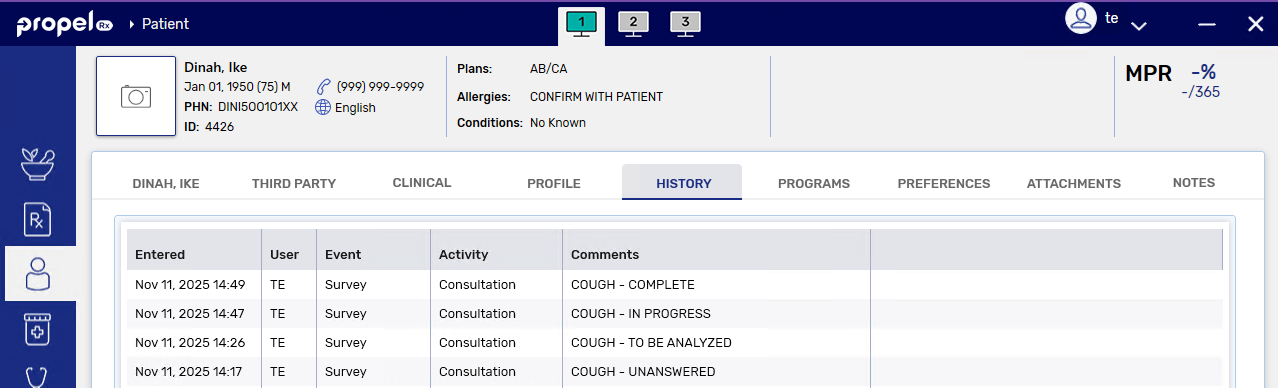
A record is added to the Patient Folder History tab with an Event of Survey, Activity of Consultation, User who sent the survey, and Comments stating the survey type and its status (complete).
-
-
Open the Patient Folder.
-
Select the History tab.
-
Select the row corresponding to the survey.

-
Select Detail to open the survey in a separate window.
-
Select Begin analysis. The status of the survey changes from "To be analyzed" to "In progress".
-
Review the patient's personal information.
-
Review the patient's answers to the survey. Take note of any red flags
. -
If after consulting with the patient, you need to modify their responses, select the edit button
to make those corrections.
-
-
Select the checkboxes for the interventions, treatments, and/or tips provided to the patient.
-
Use the Select all link to select all checkboxes in the applicable section.
-
Additional information may auto-populate when a treatment or tip is selected. Select the edit button
to modify the text if needed. You can also use the edit button to add a description for an intervention. -
Select the + button to enter a free-form item.
-
-
In the Consultation notes section, enter any free-form notes for the consultation.
-
Optional: If you want to send the patient a copy of the consultation:
-
Select Send to the patient.
-
Select the survey sections you want to include.
-
Select the preferred language.
-
Select Confirm.
-
Select the preferred method for sending the copy to the patient. The patient's phone number and email address auto-populate based on the patient's profile on the survey site. If needed, you can modify the patient's contact information for the send. Changes are saved on the survey site but do not write back to Propel Rx.
-
Select Send. A confirmation page displays.
-
Select Close tab to return to the survey.
Your pharmacy's logo can be configured to print on this document. This can be set up in Franchise Settings on the survey site.
-
-
Optional: If you want to print the consultation:
-
Select Print.
-
Select whether to print the consultation or prescription.
-
The consultation document is the same as the patient copy described in step 10.
-
The prescription document lists the selected treatments from the consultation.
-
-
Select the survey sections you want to include.
-
Select the preferred language.
-
Select Confirm. The survey will print from your computer's default printer.
-
-
If the patient completed the survey using an external link (e.g., Method = External Link), select Copy. Open the Patient Folder in Propel Rx (or create one if it does not exist) and paste the contents into a clinical note.
-
Select Finish.
-
The survey vacates the Surveys tile.
-
A clinical note is added to the Clinical History section of the Patient Folder Clinical tab with a Type of Consultation, Description of the survey type, and User who sent the survey.
-
A record is added to the Patient Folder History tab with an Event of Survey, Activity of Consultation, User who sent the survey, and Comments stating the survey type and its status (complete).
-
Viewing a Completed Consultation
If you need to view the details of a previously completed consultation, you can do so from the clinical notes or care history. Select the dropdowns to learn more.
-
Open the Patient Folder.
-
Select the Clinical tab.
-
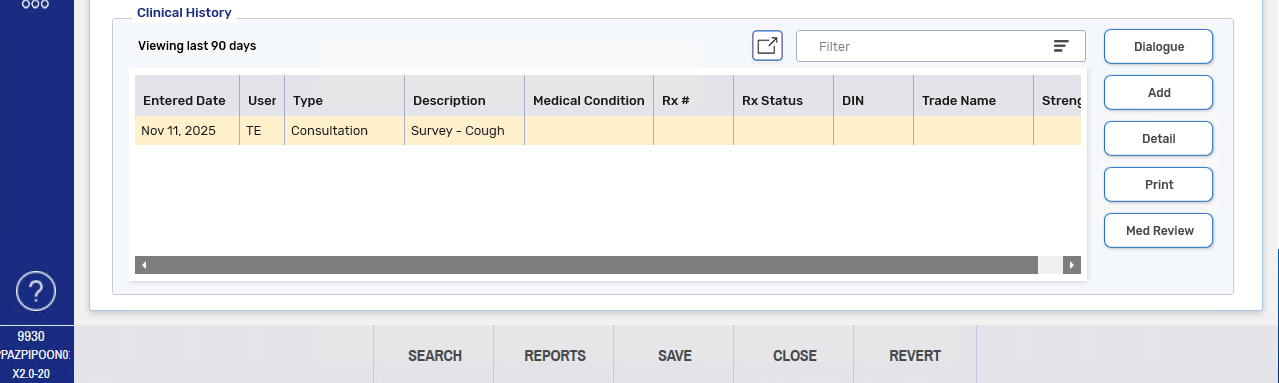
Under the Clinical History section, select the row corresponding to the survey.
To view long descriptions from the Clinical History grid, hover over the Description field. The full text will be displayed in a tooltip.
The user is the pharmacist or linked pharmacist who sent the survey which may not always correspond to the user who completed the consultation.
-
Select Detail. The Clinical Notes window opens.
-
All survey responses and consultation notes are entered in the Comments field. Select the expander button
 to view the text in a separate window. Any red flags from the survey are denoted with !!!.
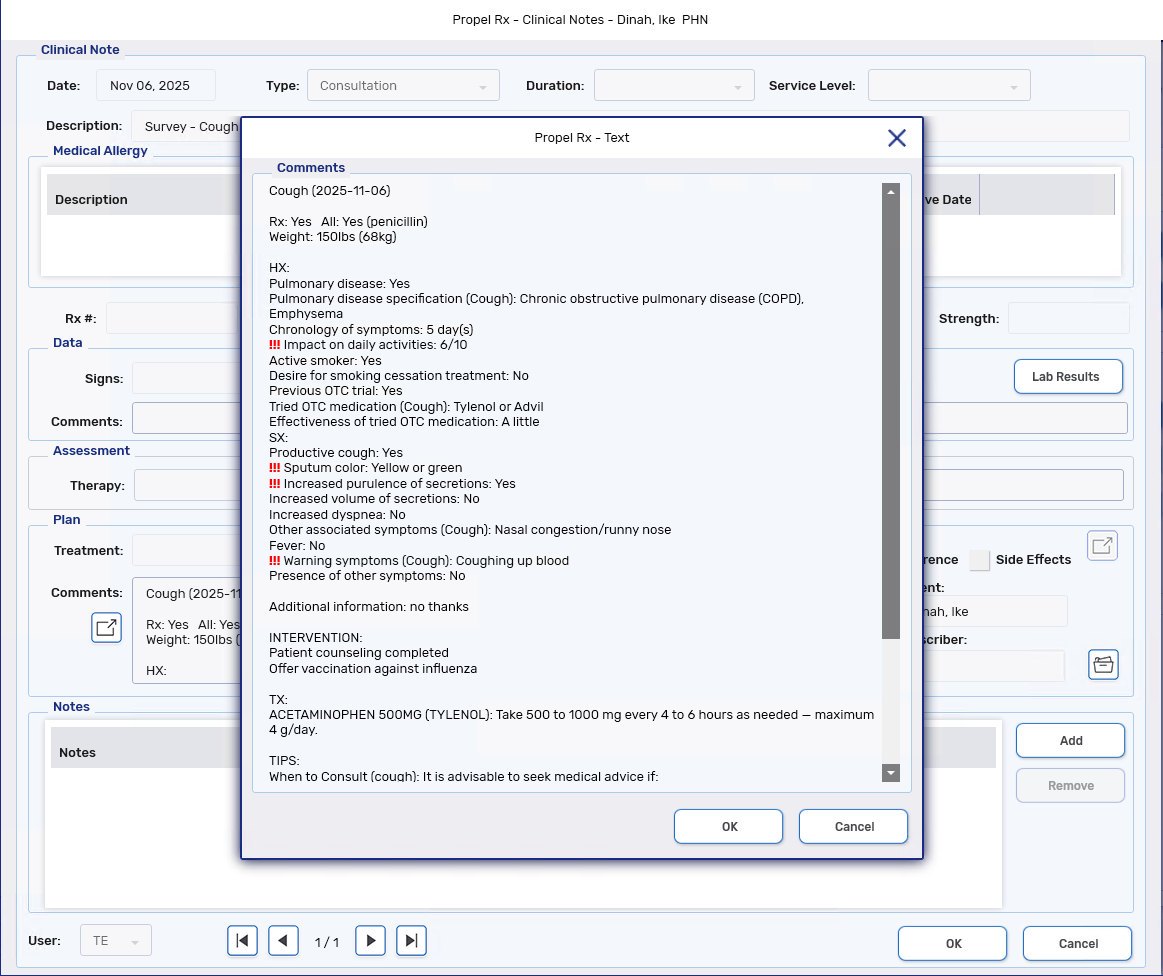
-
Open the Patient Folder.
-
Select the History tab.
-
Select a row corresponding to the survey. The row can be for any survey status.
The user is the pharmacist or linked pharmacist who sent the survey which may not always correspond to the user who completed the consultation.
-
Select Detail. The survey opens in a separate window.