Batch Scanning
Multiple prescriptions for different patients can be scanned at once using Batch Scan. This is accomplished using the barcodes that are read by the scanner.
Barcodes are printed on various documents. These barcodes are read by the scanner and automatically attached to the corresponding prescription or patient.
Barcodes can be seen at the following levels:
-
prescription Label
-
Auxiliary Label
-
prescription Hard Copy
-
Mixture Breakdown Report
-
Drug Record Book Report
-
Flu Vaccine Consent Form
-
COVID-19 Vaccine Consent Form
-
Refill Authorization Request
-
Pharmaceutical Opinion Clinical Documentation Report
-
Limited Use Form
-
Adaptation Form
-
Request Form
-
Compliance Preparation Log Report
-
Packing Slip
To use Batch Scan:
-
Ensure the scanner is powered on.
-
Load the documents in the scanner top down.
-
Select the Batch Scan navigator button
 . The Batch Scanning window opens.
-
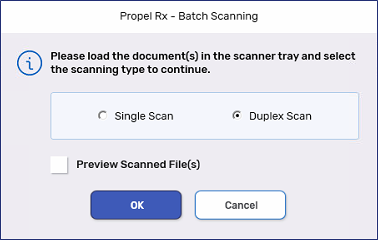
Select Single Scan or Duplex Scan, if double sided.
Sort documents by single or duplex, then by size.
-
Select Preview Scanned File(s) if you want to review the images once scanned.
-
Select OK.
-
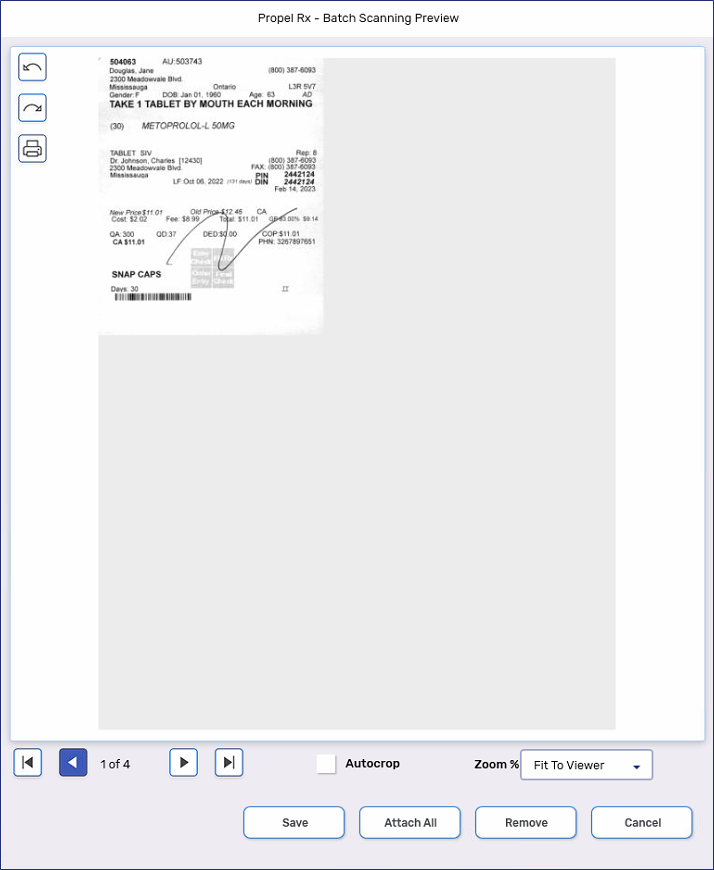
If Preview Scanned File(s) was selected, review the images in the Batch Scanning Preview window using the left

 and right
 arrow buttons.
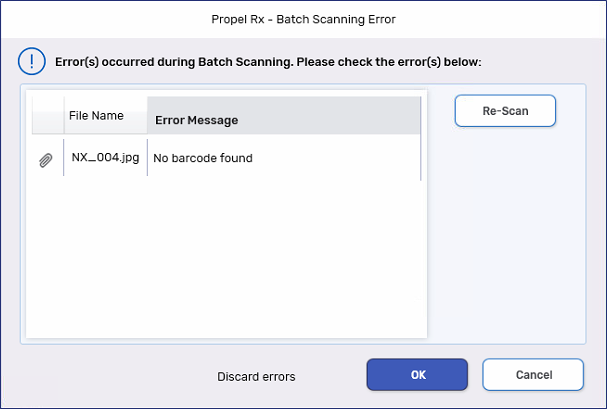
Select Attach All once finished. If any errors occur, the Batch Scanning Error window opens.
-
Review the errors in the Batch Scanning Error window, if applicable.
-
Select the paperclip icon
 beside the error to open the Preview window.
 -
Use one of the following options:
-
Select Remove to remove the scanned image from the Batch scan.
-
Dropdown the Attach to field and select the location to attach the image. Search for the applicable folder or enter the prescription number for the attachment.
-

-
-
In the Batch Scanning Error window, select OK once all errors have been reviewed.