Editing a Report Group
Once a report group is created, you can edit it to update its name or add and remove records to it. Keeping these groups up to date helps ensure your reports are generated consistently across your pharmacy.
When you add or remove records to a report group, Propel Rx automatically tracks these changes in the History tab of the applicable folder.
Any user with full access to reports in the Security Administration Facility window can add, edit, or remove report groups.
Editing the Name or Type of a Report Group
To edit a report group:
-
Do one of the following:
-
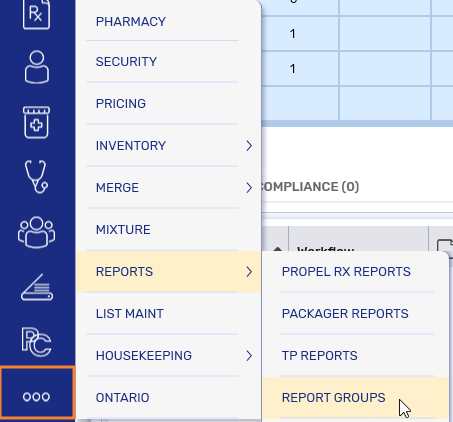
Select More (...) > Reports > Report Groups.
-
Open a report and select the Report Groups button at the bottom.

 Report Groups button is missing
A small subset of reports open in the old Propel Rx Reports application, which does not have the Report Groups button. For these reports, access report groups from the More (...) menu.
The Report Groups window opens.
-
-
Locate the report group you want to edit.
-
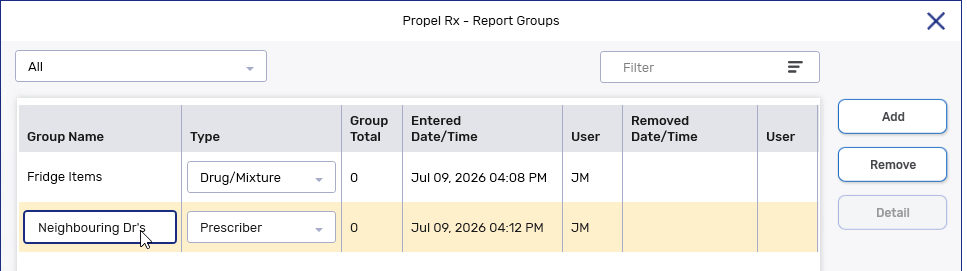
To change the report group's name, double-click it and enter the new name.
 Duplicate group name
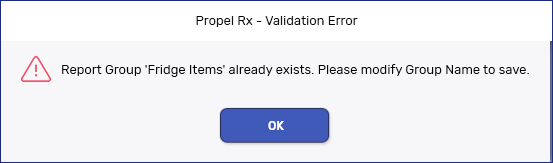
If the group name is already assigned to another report group, upon Save, this prompt will appear. Select OK and modify the name to proceed.
-
If the report group has no records associated with it, you can also change the Type. Otherwise, this field will be disabled.
-
Select Save. The report group name is updated in all locations in Propel Rx where it's available.
Adding a Record to a Report Group
Records can be added to a report group from the Report Groups window or from the record folder.
From the Report Groups window
To add a record to a report group:
-
Do one of the following:
-
Select More (...) > Reports > Report Groups.
-
Open a report and select the Report Groups button at the bottom.
Report Groups button is missing
A small subset of reports open in the old Propel Rx Reports application, which does not have the Report Groups button. For these reports, access report groups from the More (...) menu.
The Report Groups window opens.
-
-
Select the report group.
-
Select Detail.
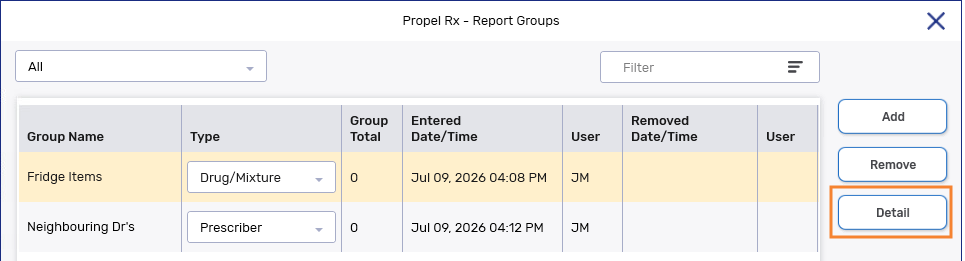
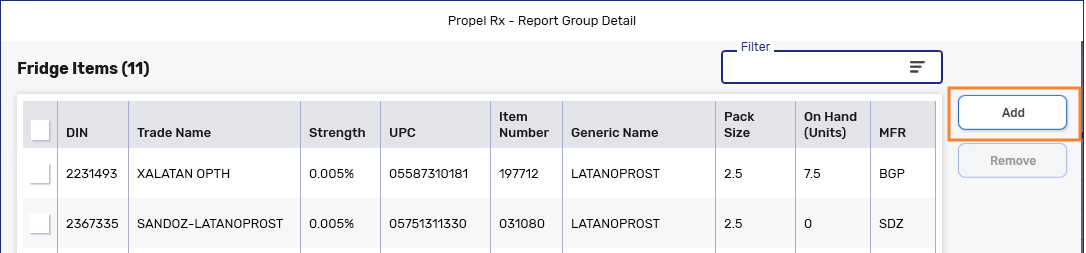
The Report Group Detail window opens, showing all records in the report group.
-
Select Add.
-
A search window appears based on the group type (i.e., Patient, Prescriber, Drug & Mixture). Search for and select the record(s) you want to add.
To add multiple records from the search results, press and hold SHIFT to select a range of records or CTRL to select specific records.
-
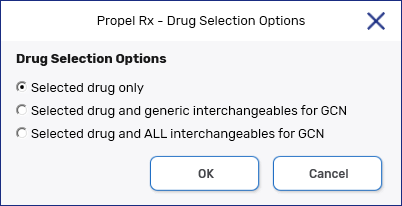
If a drug is being added to the report group, an additional prompt appears. Select one of the following options:
-
Selected drug only - adds the selected DIN only.
-
Select drug and generic interchangeables for GCN - adds the selected DIN and its generic interchangeables based on the GCN.
-
Select drug and all interchangeables for GCN - adds the selected DIN and all its interchangeables based on the GCN. This means, if you selected a generic drug, the trade name would be added to the report group as well.
What is a GCN?
A GCN is a standardized identifier issued by First Databank (FDB) that's used in pharmacy and healthcare systems to group together drug products that share the same active ingredient, strength, and dosage form - regardless of brand or manufacturer.
-
-
Select Save. The record counter at the top of the window increases by the number of DINs/PINs, patients, or prescribers added.
-
The record is now included in the group and will be available for reporting.
-
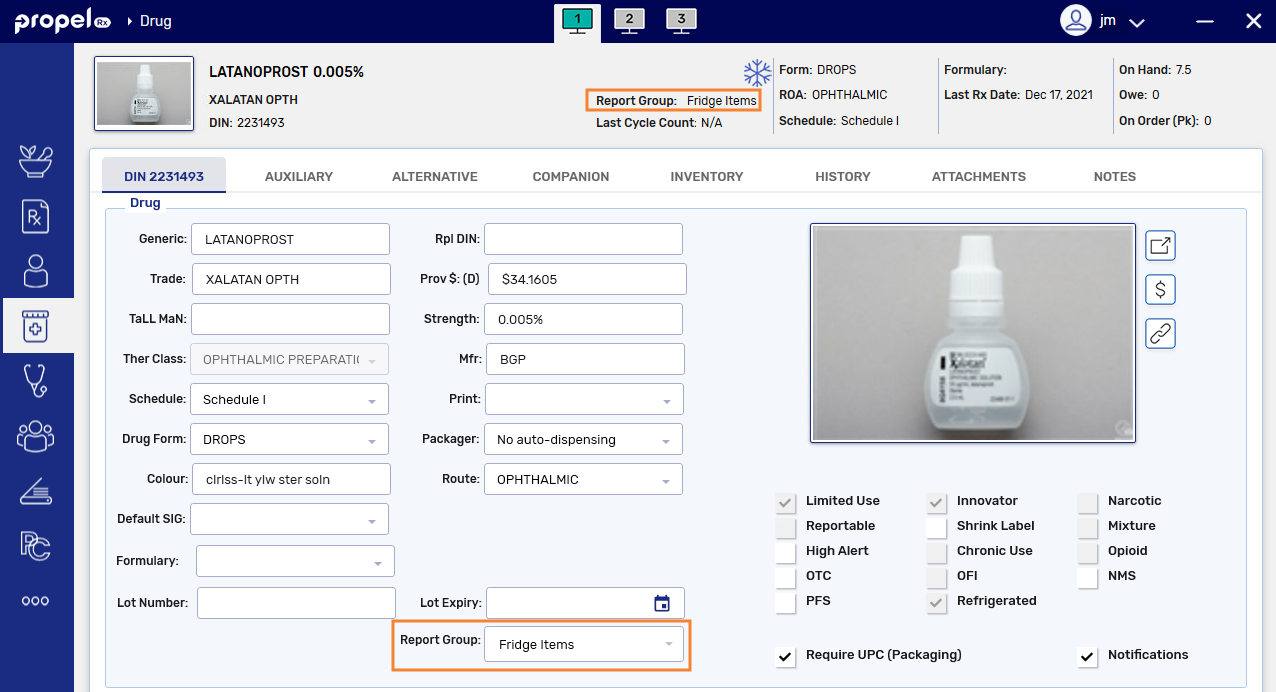
In the record folder, the report group is visible from the information bar at the top, Preferences tab (for patient records), or Main tab (for prescriber, drug, and mixture records).
-
In the record folder, a row is added to the History tab documenting the date timestamp, user, and report group name.

-
From the Record Folder
To add a record to a report group:
-
Open the applicable folder for the record (i.e., Patient, Drug, Mixture, Prescriber).
-
For patient records, select the Preferences tab.
For prescriber, drug, and mixture records, select or stay on the Main tab.
-
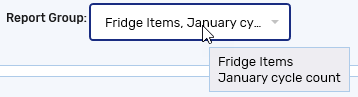
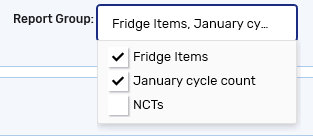
The report groups that the record subscribes to are listed in the Report Group field. Select the dropdown.
If there is more information than can be displayed in the field, an ellipses (...) appears at the end. Hover over the field to see all the report groups the record belongs to.
-
Select the report group(s) to add the record to. A record can belong to more than one report group.
-
Select Save.
-
The record is now included in the group and will be available for reporting.
-
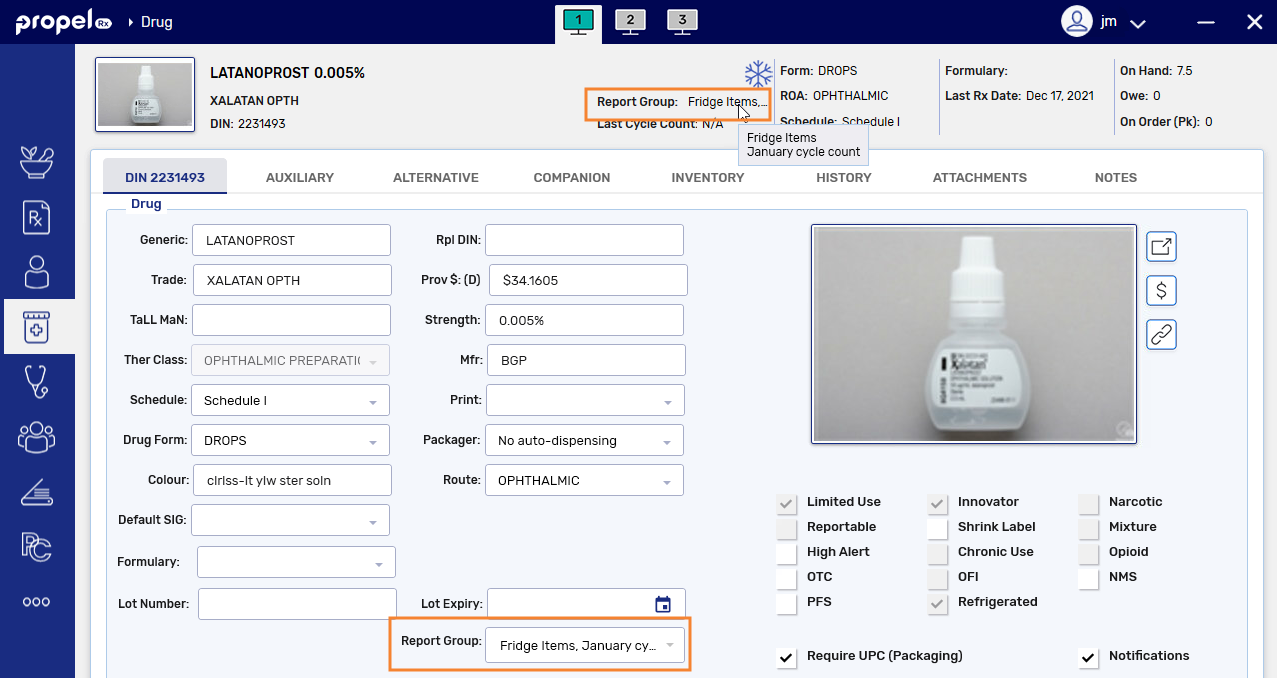
The report group is visible from the information bar at the top and Report Groups section.
If there is more report group information than can be displayed in the field, an ellipses (...) appears at the end. Hover over the field to see all the report groups the record belongs to.
-
A row is added to the History tab documenting the date timestamp, user, and report group name.

-
Removing a Record from a Report Group
Records can be removed from a report group from the Report Groups window or from the record folder.
From the Report Groups window
To remove a record from a report group:
-
Do one of the following:
-
Select More (...) > Reports > Report Groups.
-
Open a report and select the Report Groups button at the bottom.
Report Groups button is missing
A small subset of reports open in the old Propel Rx Reports application, which does not have the Report Groups button. For these reports, access report groups from the More (...) menu.
-
-
Select the report group.
-
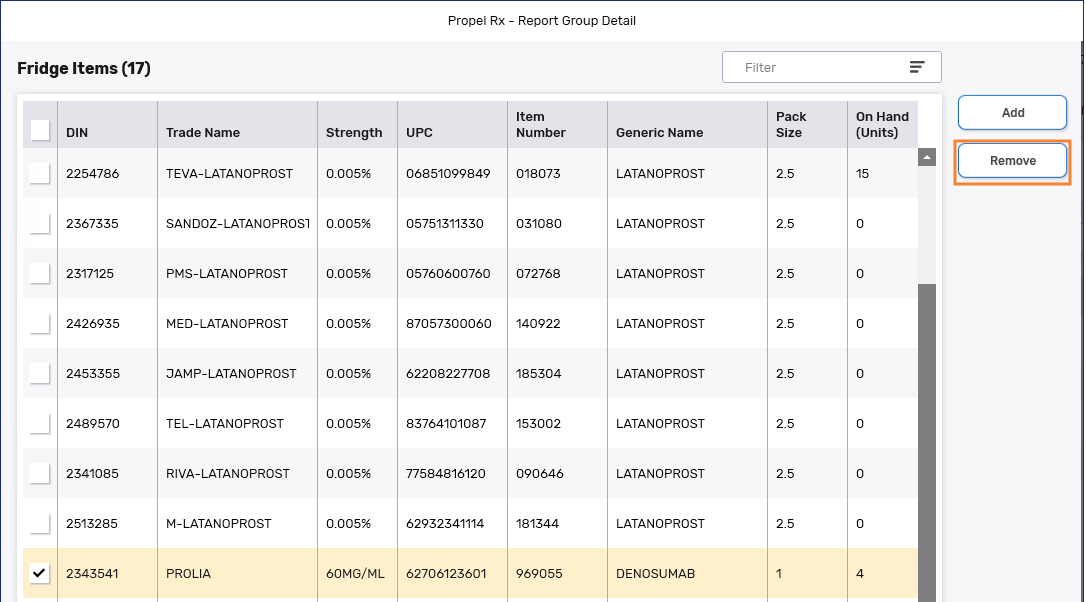
Select Detail. The Report Group Detail window opens, showing all records in the report group.
-
Select the checkboxes for the records you wish to remove.
Selecting the checkbox in the header selects all records.
-
Select Remove.
-
Select Save. The record counter at the top of the window is updated based on the number of DINs/PINs, patients, or prescribers removed.
-
The record is now removed from the group and will no longer be included in reports generated for that group.
-
In the record folder, the report group is no longer visible from the information bar at the top, Preferences tab (for patient records), or Main tab (for prescriber, drug, and mixture records).
-
In the record folder, a row is added to the History tab documenting the date timestamp, user, and report group name.

-
From the Record Folder
To remove a record from a report group:
-
Open the applicable folder for the record (i.e., Patient, Drug, Mixture, Prescriber).
-
For patient records, select the Preferences tab.
For prescriber, drug, and mixture records, select or stay on the Main tab.
-
The report groups that the record subscribes to are listed in the Report Group field. Deselect the report group(s) the record should no longer belong to.
-
Select Save.
-
The record is now removed from the group and will no longer be included in reports generated for that group.
-
The report group is removed from the information bar at the top and Report Groups section.
If there is more report group information than can be displayed in the field, an ellipses (...) appears at the end. Hover over the field to see all the report groups the record belongs to.
-
A row is added to the History tab documenting the date timestamp, user, and report group name.
-