Processing a New Prescription
-
Data Entry
-
Packaging
-
Technical Validation
-
Clinical Review
Data Entry
For new prescriptions, the Data Entry queue includes:
-
Using the Intake window for new prescriptions and adjudicating them through Rx Detail.
-
Processing and adjudicating prescriptions that were added to the Workbench, either from the Intake window or one of the programs the patient is enrolled in or your pharmacy is registered for.
For more information about prescriptions that are already in the Data Entry queue, see Processing Prescriptions from the Data Entry Queue.
Select the applicable tab to learn about processing new prescriptions in your province.
To process a new prescription:
-
From the Workbench or from the patient's Profile tab, select Intake. The Intake window appears.
-
In the Patient field, search for and select the patient.

This information is automatically populated if creating a new prescription from the patient's Profile tab.
-
Attach a prescription by selecting one of the following options:
-
New Scan - allows you to scan the prescription at time of entry.
-
Select Image - allows you to select a scanned document attached in the Patient Folder.
-
 Written Prescription - allows you to select a document saved on the workstation.
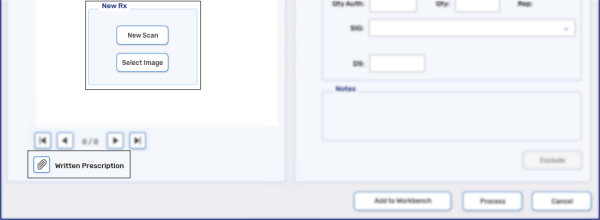
If you're only collecting the prescription from the patient and the prescription is being adjudicated at another workstation, or at another time, once you have a patient selected, you can select Add to Workbench. This adds the prescription to the Data Entry queue for later processing. It is recommended a prescription is scanned at Intake before doing this.
For more information about processing this prescription at another workstation or at a later time, see Processing Prescriptions from the Data Entry Queue.
-
-
Enter the following information:
-
Prescriber
-
Drug Name
If you have a scanner attached to the workstation, you can scan the UPC of the bottle.
-
Qty Auth
-
Qty
-
SIG
-
DS
-
-
Select Process. The prescription opens in Rx Detail.
If the drug is already on the patient's Profile, a Duplicate Checking prompt appears. For more information, see Duplicate Checking.
-
Verify the information in Rx Detail and make any necessary changes.
If Close is selected when in Rx Detail, the prescription remains in the Data Entry queue and can be accessed from there. For more information, see Processing Prescriptions from the Data Entry Queue.
-
Select Fill to adjudicate the prescription.
-
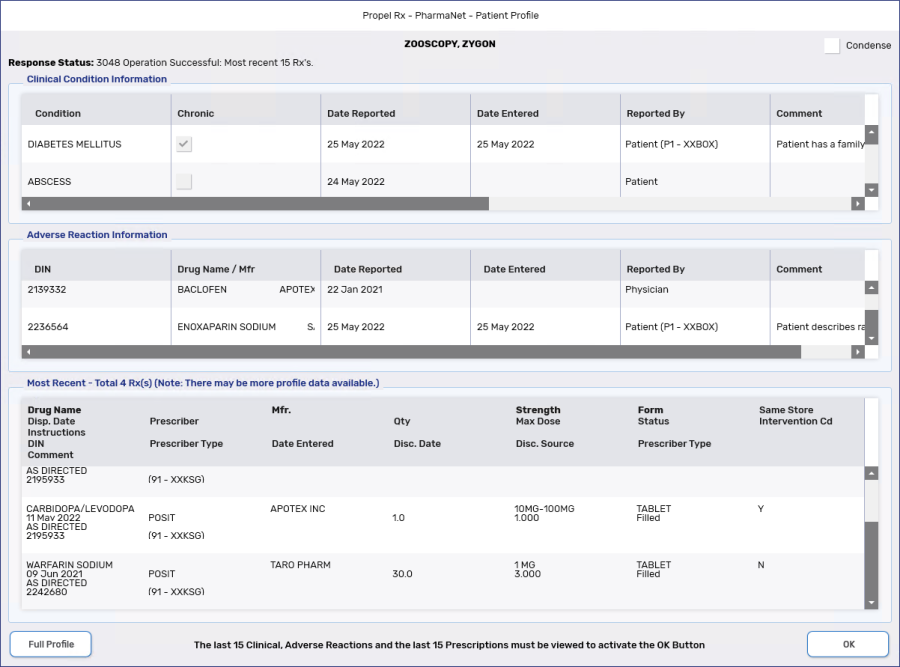
The patient's PharmaNet Profile opens. The Profile displays information about the patient's clinical conditions, adverse reactions, and prescription history. You must view the last 15 clinical conditions, adverse reactions, and prescription records before the OK button is enabled.
When filling a succession of prescriptions, the PharmaNet Profile displays only once before the first prescription is filled.
-
Select OK.
-
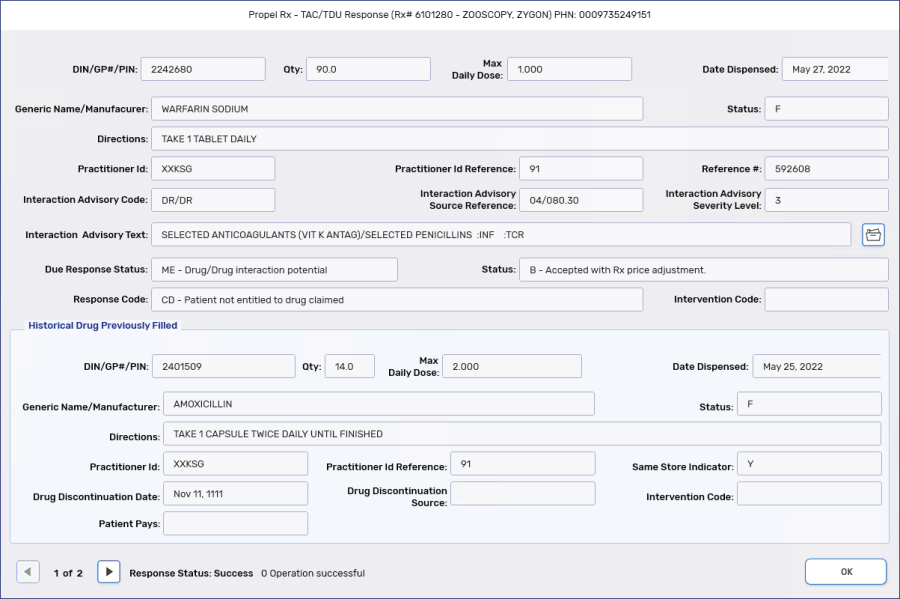
The TAC/TDU Response window opens. It shows the response from PharmaNet for the submitted prescription and the patient's historical data related to the drug. The window is read only and cannot be modified. Use the arrow button
 to review each page, if there is more than one. Select OK.
The TAC/TDU Response window appears for each prescription that is processed. Batched prescriptions are not completed until the TAC/TDU Response windows are viewed.
-
The Claim Summary window opens. Information from PharmaNet is displayed in the Claim Response Message section including:
-
Plan information (i.e. expiry date)
-
Pricing information (i.e. LCA/RBP pricing, fee)
-
Drug information (i.e. special authority, benefit status)
-
Restrictions
Review the window and make any necessary waives.
The PharmaNet response messages are not stored in the prescription. This means you cannot detail the prescription afterwards to view the messages. Codes are printed on the receipt which correspond to the messages.
-
-
Select OK.
Next Steps?
If the patient already has a record of this medication on their Profile, a Duplicate Checking prompt appears to confirm how to handle the new prescription.

To gain better insight on how to handle the new prescription, the Duplicate Checking prompt displays information about the existing prescription on file, such as:
-
Rx#
-
Quantity filled
-
Days supply
-
Refills remaining
Based on the information displayed, select one of the following:
-
Refill - Refills the prescription currently on file.
-
ReAuth - reauthorizes the existing prescription on file, voiding any repeats remaining.
-
New Rx - creates a new prescription and does not link it to the current prescription on file.
-
Cancel - returns to the Intake window.
To process a new prescription:
-
From the Workbench or from the patient's Profile tab, select Intake. The Intake window appears.
-
In the Patient field, search for and select the patient.

This information is automatically populated if creating a new prescription from the patient's Profile tab.
-
Attach a prescription by selecting one of the following options:
-
New Scan - allows you to scan the prescription at time of entry.
-
Select Image - allows you to select a scanned document attached in the Patient Folder.
-
 Written Prescription - allows you to select a document saved on the workstation.
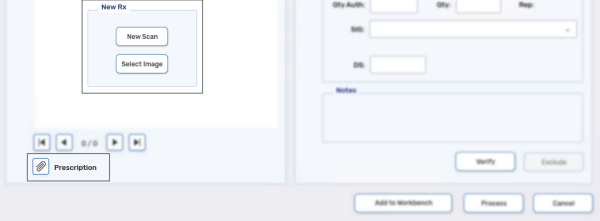
If you're only collecting the prescription from the patient and the prescription is being adjudicated at another workstation, or at another time, once you have a patient selected, you can select Add to Workbench. This adds the prescription to the Data Entry queue for later processing. It is recommended a prescription is scanned at Intake before doing this.
For more information about processing this prescription at another workstation or at a later time, see Processing Prescriptions from the Data Entry Queue.
-
-
Enter the following information:
-
Prescriber
-
Drug Name
If you have a scanner attached to the workstation, you can scan the UPC of the bottle.
-
Qty Auth
-
Qty
-
SIG
-
DS
-
-
Select Process. The prescription opens in Rx Detail.
If the drug is already on the patient's Profile, a Duplicate Checking prompt appears. For more information, see Duplicate Checking.
-
The Patient EHR Access Reason window opens if the patient's EHR Profile has not been viewed yet. Select a reason for accessing the patient's EHR Profile and enter any additional comments if needed. Select OK.
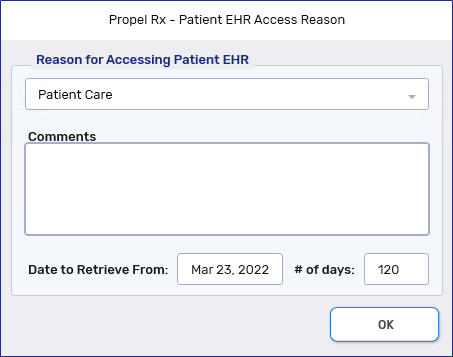
Review the patient's EHR Profile and select OK once done.
-
Verify the information in Rx Detail and make any necessary changes.
If Close is selected when in Rx Detail, the prescription remains in the Data Entry queue and can be accessed from there. For more information, see Processing Prescriptions from the Data Entry Queue.
-
Select Fill to adjudicate the prescription.
-
If there are any Detected Issues, the Detected Issues Maintenance window opens. Review the window and add any appropriate Issue Management codes as needed.
-
Select OK.
-
The Claim Summary window opens. Review the window and make any necessary waives.
-
Select OK.
Next Steps?
If the patient already has a record of this medication on their Profile, a Duplicate Checking prompt appears to confirm how to handle the new prescription.

To gain better insight on how to handle the new prescription, the Duplicate Checking prompt displays information about the existing prescription on file, such as:
-
Rx#
-
Quantity filled
-
Days supply
-
Refills remaining
Based on the information displayed, select one of the following:
-
Refill - Refills the prescription currently on file.
-
ReAuth - reauthorizes the existing prescription on file, voiding any repeats remaining.
-
New Rx - creates a new prescription and does not link it to the current prescription on file.
-
Cancel - returns to the Intake window.
To process a new prescription:
-
From the Workbench or from the patient's Profile tab, select Intake. The Intake window appears.
-
In the Patient field, search for and select the patient.

This information is automatically populated if creating a new prescription from the patient's Profile tab.
-
Attach a prescription by selecting one of the following options:
-
New Scan - allows you to scan the prescription at time of entry.
-
Select Image - allows you to select a scanned document attached in the Patient Folder.
-
 Written Prescription - allows you to select a document saved on the workstation.

If you're only collecting the prescription from the patient and the prescription is being adjudicated at another workstation, or at another time, once you have a patient selected, you can select Add to Workbench. This adds the prescription to the Data Entry queue for later processing. It is recommended a prescription is scanned at Intake before doing this.
For more information about processing this prescription at another workstation or at a later time, see Processing Prescriptions from the Data Entry Queue.
-
-
Enter the following information:
-
Prescriber
-
Drug Name
If you have a scanner attached to the workstation, you can scan the UPC of the bottle.
-
Qty Auth
-
Qty
-
SIG
-
DS
-
-
Select Process. The prescription opens in Rx Detail.
If the drug is already on the patient's Profile, a Duplicate Checking prompt appears. For more information, see Duplicate Checking.
-
Verify the information in Rx Detail and make any necessary changes.
If Close is selected when in Rx Detail, the prescription remains in the Data Entry queue and can be accessed from there. For more information, see Processing Prescriptions from the Data Entry Queue.
-
Select Fill to adjudicate the prescription.
Next Steps?
If the patient already has a record of this medication on their Profile, a Duplicate Checking prompt appears to confirm how to handle the new prescription.

To gain better insight on how to handle the new prescription, the Duplicate Checking prompt displays information about the existing prescription on file, such as:
-
Rx#
-
Quantity filled
-
Days supply
-
Refills remaining
Based on the information displayed, select one of the following:
-
Refill - Refills the prescription currently on file.
-
ReAuth - reauthorizes the existing prescription on file, voiding any repeats remaining.
-
New Rx - creates a new prescription and does not link it to the current prescription on file.
-
Cancel - returns to the Intake window.