Completing Technical Validation for an Owe Balance When Digital Owe Balance is ON
This topic is not applicable if Technical Validation is not enabled. If Technical Validation is enabled, please be advised this step cannot be completed for Owe Balances in Patient Centre.
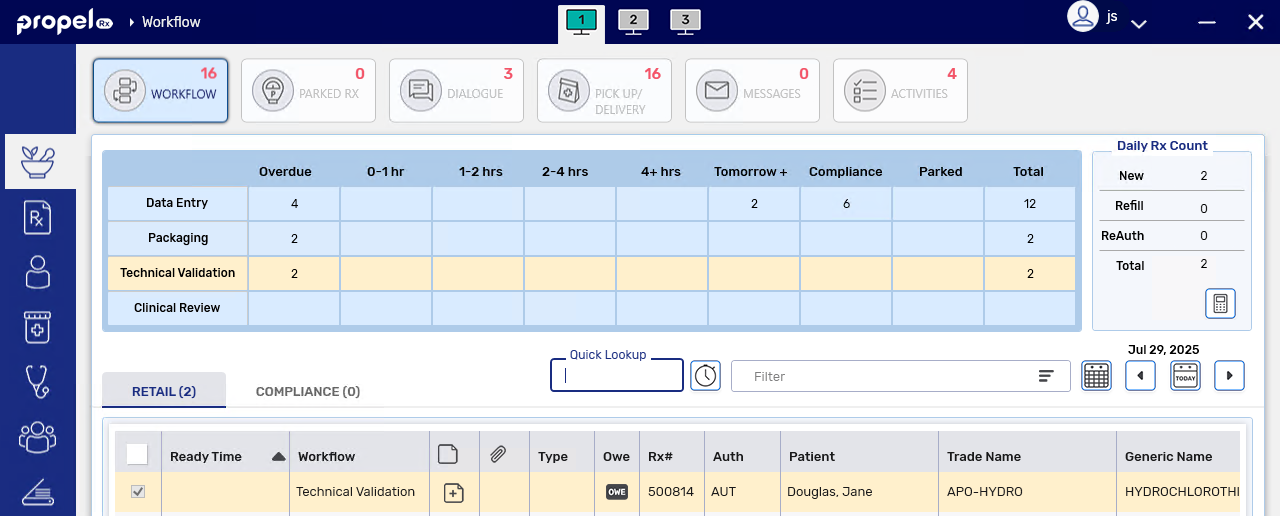
If Digital Owe Balance is ON, after an Owe Balance completes Packaging (or Data Entry if Packaging is OFF), it moves to Technical Validation, if the queue is enabled.
You can complete the Technical Validation step for an Owe Balance in isolation or in combination with other prescriptions or Owe Balances in the Aggregate window. Pharmacist and Pharmacy Technician users will be allowed to complete Technical Validation for an Owe Balance.
Non-Aggregate Technical Validation for an Owe Balance
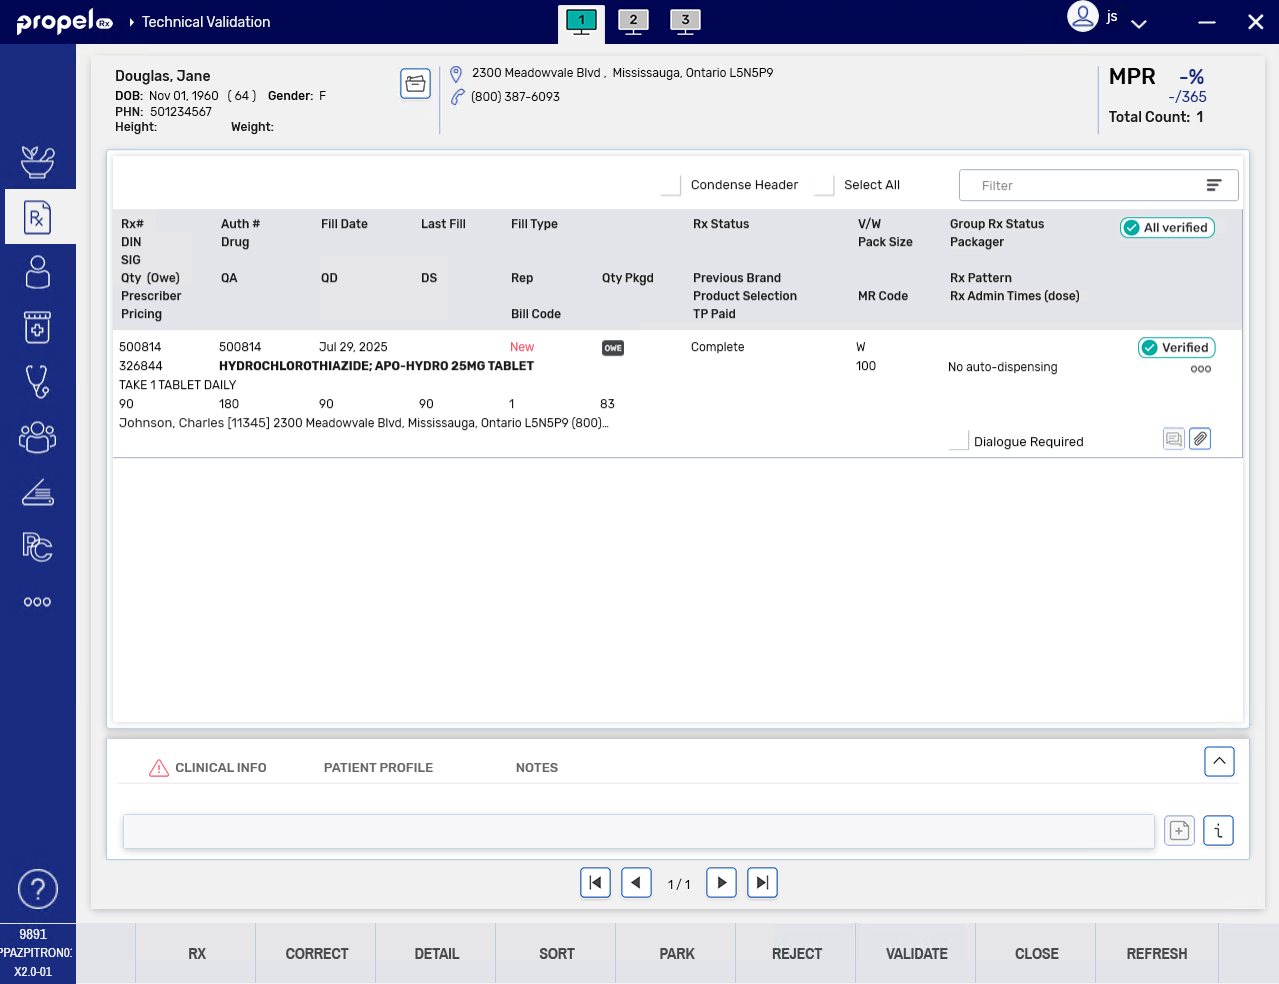
Once an Owe Balance moves to Technical Validation, the initial fill e-File copy will be automatically attached to the prescription for reference purposes. In the Technical Validation window, you can view the prescription images and e-File copy for the initial fill on the left.
If the initial fill is rebilled, the initial fill e-file copy that's attached to the prescription will be updated.
For Owe Balances, you will not be required to validate pricing details or in British Columbia, perform the Allergy, PharmaNet, and D.T. Issues check (i.e., these checkboxes will be disabled).
To complete non-Aggregate Technical Validation for an Owe Balance:
-
Do one of the following:
-
Navigate to the Workflow tile. Ensure the Technical Validation queue is selected. Select the prescription with the OWE indicator and then Process.
-
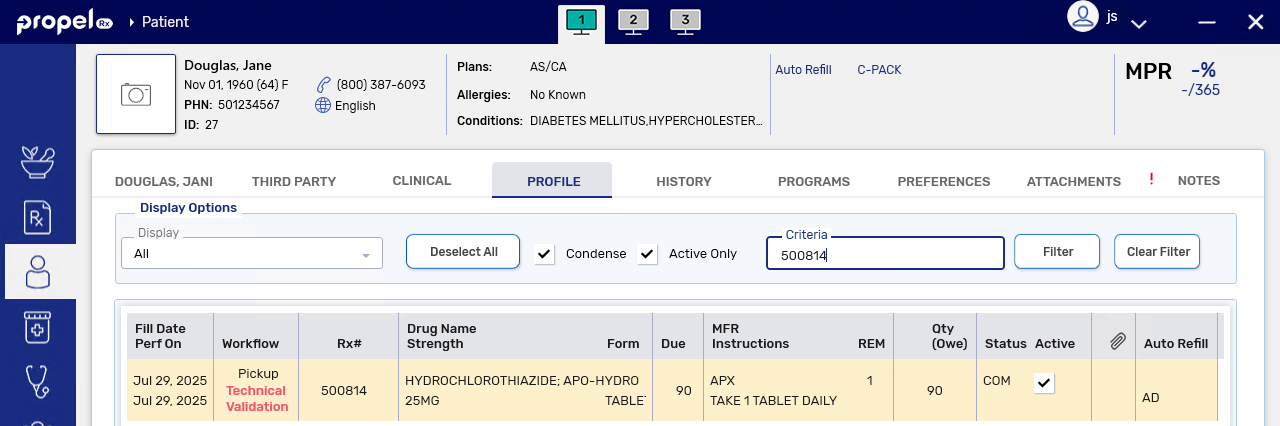
From the Patient Profile, select the prescription with the Owe Balance and then Process.
The Owe Balance opens in Technical Validation. The Fill Type field at the top will be appended with an "(OWE)" to indicate you are checking an Owe Balance.

-
-
Review the information in the following sections by comparing the information against the attached prescription and initial fill e-File copy.
-
Patient
-
Prescriber
-
Drug
-
Prescription
The Qty Packaged will reflect the amount Packaged for the Owe Balance. You can select the expander button
 in the Prescription section to open a read-only view of the Owe Balance Packaging window.
 -
-
Select the e-verification checkbox next to each section to confirm the information is accurate. These checkboxes will only appear if E-Verification Checkboxes is ON in Workflow Preferences.

-
Select Validate Rx.
-
The Owe Balance completes Workflow.
-
In Workflow Details, a Technical Validation row and Product Verify sub-row are added for the Owe Balance with an "(OWE)" appended to them. An Entry Check sub-row is not added as this check is not applicable to Owe Balances.
-
Aggregate Technical Validation for an Owe Balance
Similar to the non-Aggregate Technical Validation window, you will not be required to validate pricing details or in British Columbia, perform the Allergy, PharmaNet, and D.T. Issues check for an Owe Balance in the Aggregate window. However, if an Owe Balance is processed into the Aggregate window with non-Owe Balances, the Allergy, PharmaNet, and D.T. Issues checkboxes will be enabled but only apply to non-Owe Balances.
For more information about Aggregate checking, see Aggregate Technical Validation and/or Clinical Review.
To complete Aggregate Technical Validation for an Owe Balance:
-
Do one of the following:
-
Navigate to the Workflow tile. Ensure the Technical Validation queue is selected. Select the prescription with the OWE indicator and then Process.
-
From the Patient Profile, select the prescription with the Owe Balance and then Process.
The Owe Balance opens in the Aggregate window.
-
-
Review the information for the Owe Balance.
-
Once the Owe Balance has been checked, select the Verify button. The prescription drops to the bottom of the list, and the Verify button is renamed to Verified and changes to green.
Owe Balances are also exempt from the requirement of having their images viewed if the Verify Aggregate Image preference is ON.
-
Repeat steps 3 - 4 for the remaining prescriptions in the Aggregate window. Use the toggle buttons


 at the bottom to navigate to the next patient if applicable.
 For more information about checking non-Owe Balance prescriptions in the Aggregate window, see Completing Aggregate Technical Validation and/or Clinical Review.
-
Select Validate Rx (if only the Technical Validation queue was selected) or Sign Rx (if Technical Validation and Clinical Review queues were selected).
-
If Sign Rx is selected, enter your signature, user credentials, or fingerprint.
-
The Owe Balance completes Workflow.
-
The signature will be applied to the non-Owe Balance prescriptions. No signature will be recorded for Owe Balances.
-
In the Workflow Details window, a Technical Validation row and Product Verify sub-row are added with an "(OWE)" appended to them. An Entry Check sub-row is not added as this check is not applicable to Owe Balances.

-
What's Next?
-
If you want to record Dialogue for the Owe Balance, you can do so from outside the Dialogue tile. Owe Balances will not be placed in the Dialogue tile regardless of the E-Dialogue setting in Workflow Preferences.
-
If POS integration is ON, the Owe Balance moves to the Pick Up/Delivery with a Waiting for Pickup or Waiting for Delivery status. For more information, see Picking Up Owe Balances.
For POS integrated pharmacies only: if previous dispenses for the same prescription (i.e., initial fill or other Owe Balances) are Waiting for Pickup or Delivery, this banner will appear at the top of the Technical Validation window. If needed, collect the previous dispenses so they can be bagged together and given to the patient.

-
If POS integration is OFF, the Owe Balance moves to a Picked Up status.