Screenshots
This topic is intended for Independent pharmacies only and is not applicable to Rexall pharmacies.
There are several different ways to take a screenshot on a Microsoft Windows operating system. Use the dropdowns below to learn more.
Snip & Sketch allows you to take screenshots of different sizes and mark them up if needed.
To take a screenshot with Snip & Sketch:
-
Open the window or screen that you would like a screenshot of.
-
Press the Windows, Shift, and S keys on the keyboard at the same time. This activates the Snipping Tool. A toolbar displays at the top with different options.
The order you press the keyboard buttons matter. Ensure you are pressing the buttons in the order specified above.

-
Select one of the following options:
-
 = allows you to capture a rectangular area you draw on your screen.
 -
 = allows you to capture a freeform area you draw on your screen.
 -
 = allows you to capture a window.
 -
 = allows you to capture your full screen.
-
-
Do one of the following:
-
If capturing a rectangular or freeform area, hold the left button on your mouse and draw the shape. Once the desired area has been enclosed by the shape, release the left mouse button.
-
If capturing a window, click anywhere on the window you wish to capture.
-
If capturing a full screen, click anywhere on your screen.
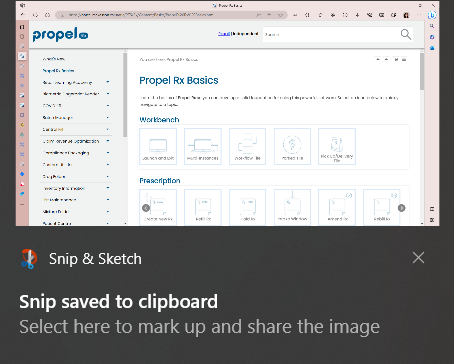
A prompt appears at the bottom right corner of your screen to indicate that the screenshot has been saved to the clipboard.

-
-
Optional: If you want to edit the image, click on the prompt to open Snip & Sketch.
-
Optional: Add any necessary markups in Snip & Sketch and select the Copy button
 once complete.
 You can save a screenshot directly in Snip & Sketch by selecting the Save button
 . If you prefer to paste the screenshot into another document, complete steps 7 - 10 below.
 -
Open WordPad or another word processing application.
You can quickly open an application by typing in the name of the application in the Windows search bar.
-
Press the CTRL and V keys on your keyboard at the same time. The screenshot should be displayed in the document.
-
Optional: Select File > Save As to save the document if needed.
-
Optional: Select File > Print to print the document if needed.
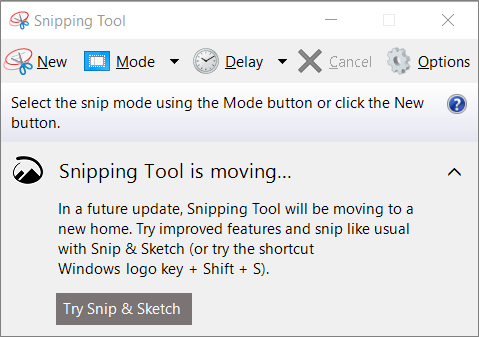
The Snipping Tool, like Snip & Sketch, allows you to take screenshots of different sizes and mark them up if needed. In addition, you can create delayed screenshots.
To take a screenshot with the Snipping Tool:
-
Open the window or screen that you would like a screenshot of.
-
In the Search field of the Windows task bar, type "snipping tool."
If you can't find the Windows Search field, select the Windows icon and type "snipping tool".
-
Select the Snipping Tool app from the search results. Snipping Tool opens.

-
Optional: Dropdown the Delay header and select the number of seconds you want to delay the screen capture.
-
Dropdown the Mode header and select one of the following:
-
Free-form Snip = allows you to capture a freeform area you draw on your screen.
-
Rectangular Snip = allows you to capture a rectangular area you draw on your screen. This is the default mode.
-
Window Snip = allows you to capture a window.
-
Full-screen Snip = allows you to capture your full screen.
-
-
Do one of the following:
-
If capturing a rectangular or freeform area, hold the left button on your mouse and draw the shape. Once the desired area has been enclosed by the shape, release the left mouse button.
-
If capturing a window, click anywhere on the window you wish to capture.
The screenshot appears in the Snipping Tool window.
-
-
Optional: Add any necessary markups and select the Copy button
 once complete.
 You can save a screenshot directly in the Snipping Tool by selecting the Save button
 . If you prefer to paste the screenshot into another document, complete steps 8 - 11 below.
 -
Open WordPad or another word processing application.
You can quickly open an application by typing in the name of the application in the Windows search bar.
-
Press the CTRL and V keys on the keyboard at the same time. The screenshot should be displayed in the document.
-
Optional: Select File > Save As to save the document if needed.
-
Optional: Select File > Print to print the document if needed.
You can use the Print Screen button on your keyboard to capture an active window or the full screen.
To take a screenshot with the Print Screen button:
-
If capturing a particular window, open the window or screen that you would like a screenshot of.
-
Do one of the following:
-
If capturing a particular window, press the Alt and Print Screen keys on your keyboard at the same time. This takes a screenshot of the active window.
-
If capturing the full screen, press the Print Screen key on your keyboard.
-
If capturing the full screen AND you want to automatically save the screenshot, press the Windows and Print Screen keys on your keyboard at the same time. This takes a screenshot of the active window AND saves it to This PC > Pictures > Screenshots.
The order you press the keyboard buttons matter. Ensure you are pressing the buttons in the order specified above.
-
-
Open WordPad or another word processing application.
You can quickly open an application by typing in the name of the application in the Windows search bar.
-
Press the CTRL and V keys on the keyboard at the same time. The screenshot should be displayed in the document.
-
Optional: Select File > Save As to save the document if needed.
-
Optional: Select File > Print to print the document if needed.